by Sara Barry | Jan 28, 2015 | cooking, use what you have, what I love
I love a good snow storm.
I love waking to the quiet, sounds muffled by the blanket of white, even the rumble-scrape-clank of the plow quieted.
I love staying in my pjs late into the morning, savoring my coffee, standing at the counter mixing pancakes, listening to sausage sizzle on the stove.
I love too that my kids can get themselves into snowsuits, hats, boots, mittens with maybe just a little help with the zipper and get out the door to make snowmen and snow forts while I sip a little more coffee, read another chapter of my book.
I love getting out for the clearing, the roar of snowblowers up and down the street, talking with neighbors, the way people help others.
I love my girls’ excitement sledding, though bump that they mostly ignore jolts through me.
I love rosy cheeks coming back in for cocoa and snuggling back into pjs in front of the fire.
We had a snow storm yesterday that didn’t live up to the hype, but it slowed us down. Maybe that’s what I like best about a good snow storm, that slow down, winter’s permission to skip our regular routines and hunker in.
Today, we’re back to normal, almost. School starts late for my big girl, which means school is cancelled for the little one. Maybe they’ll sleep in. Maybe we’ll snuggle and read in front of the fire or they’ll practice their magic or work on a project. Maybe they’ll zip themselves up and get out into the snow long before it’s time to look for the bus. In any case, we have a little extra time today, not the full day stretching ahead of us like yesterday, but two hours to play with before we jump back in to school and work and errands.
That extra time on snow days always leads me to a special breakfast—pancakes or waffles, something I wouldn’t do on regular school day. This was our treat from yesterday, using the Fannie Farmer griddlecake recipe as a starting point and using the tiny bit of cider that was hiding in the back of the fridge. Butterfly pancakes would have been a treat too.
Snow Day Spiced Cider Pancakes
1 cup milk
½ cup cider
2 Tbsp butter melted
1 egg
1 cup flour
2 tsp baking powder
1 Tbsp sugar
1 tsp cinnamon
dash nutmeg
¼ tsp cloves
½ tsp salt
- Melt the butter in a small bowl (I use a four cup liquid measurer). Add the egg, milk, and cider and mix.
- In a larger bowl, combine the flour, baking powder, sugar, cinnamon, nutmeg, cloves, and salt.
- Add the wet mixture to the dry and stir just enough to combine.
- Heat and grease your griddle. Drop batter by the spoonful on the hot griddle. When the tops begin to dimple, flip them to brown the other side.
So I love a good storm. What do you love?
Tell me in the comments—and sign up for Write What You Love, it’s fun and free and starts February 11.
by Sara Barry | Oct 22, 2014 | abundance, cooking, fall, grief, use what you have, what's for dinner, writing
Some people waste away when under stress or grieving.
I eat.
When my son was in the hospital, I ate cookies and candy because I had them, big, heavy restaurant-sized meals. I ate whatever plate or dinner people brought me. It didn’t matter how hungry I was or if it was what I wanted (don’t get me wrong, people brought us good stuff); I just ate.
But after he died, when I was home, I cooked.
I made soups and stews, mac and cheese, scalloped potatoes, chicken pot pie. I sautéed greens that I got at the farmer’s market. I toasted bread from the bakery, rubbed it with garlic, drizzled it with olive oil, sprinkled coarse salt.
Maybe I was trying to satiate a hunger not related to food. Maybe I just needed food from home after not being there for three months. Maybe the rhythm of the kitchen soothed me, kept me busy enough without requiring too much thought or energy.
I cooked and I ate, and although the grocery store was a gauntlet of anxiety—ignore the birthday cakes, don’t go down the baby aisle, hold your breath hoping the cashier won’t ask anything about kids—I shopped for food. I went to farmers markets. I paid more for cheese than I should have. I got a farm share of meat and bought local eggs and honey.
I hadn’t worked for almost seven months and was limping along trying to get my sluggish brain to function enough to get through the projects that fell on my desk. B. was going to quit his job come fall to go back to school. I had no business spending extra money on food, and months later when B. actually did quit his job and I readied for another self-paid maternity leave, I gave up the farm share, started buying conventional eggs more and more, cut back on the cheese.
But still I cooked. Still I ate well, and I still took comfort in food.
These days, I still cook, still like to choose good food, still like to do something with the veggies I bring in from the garden. Though with little ones pouting, “I won’t eat that” without even trying it, some days I want to go on a hunger strike, holding out on making food until they are hungry enough to eat whatever it is.
Last night I made potato leek soup with potatoes and onions and carrot and herbs from our garden. I served it with garlic toast with cheese. We started dinner with two whines, but eventually one ate the soup and one at the grilled cheese (it worked better when we put the toast together and called it that). I sat back and enjoyed both.
It was a chilly day, and soup was comforting and warm as the darkness gathered. Comfort food isn’t just for hard times; sometimes we just need to feel cozy at home.
What’s your favorite comfort food?
Potato Leek Soup
olive oil or butter
1 stalk celery, diced
1 large carrot (or equivalent), chopped in half rounds (or quarters if the carrot is fat)
1 ½ cups chopped leeks* (approximate)
salt and pepper
2 quarts broth **
5 medium potatoes, peeled and diced
2 sprigs rosemary
2 sprigs thyme
1 bay leaf
large splash heavy cream (optional, but recommended)
- Sauté the carrots, celery, and leeks until softened. Sprinkle with salt and pepper.
- Add the broth, potatoes, and herbs. Bring to just a boil and lower the heat. Simmer for a long time until the potatoes start to break down.
- Look at your soup and debate whether to bother puréeing it. Take a taste. Wonder if you should add milk like you usually do. Take a Facebook poll.
- Use an immersion blender to smooth out the soup, leaving some small chunks. Taste again. Add a hefty splash of heavy cream if you have it.
- Serve with garlic toast, cheesy or not, and hope your kids will eat it without too much of a stink.
Notes
* I actually used Egyptian walking onions in this version. I included any green parts that looked vibrant. They fade as they cook, but still taste good.
** I used homemade chicken broth this time, because I happened to have it in my fridge and wasn’t in the mood for chicken soup, but I’ve made great soup with canned/boxed chicken or vegetable broth. I went heavier on the salt because I knew my base was lower in sodium.
by Sara Barry | Oct 17, 2014 | abundance, cooking, fall, use what you have, what's for dinner
It’s Harvest Feast night at my kids’ school.
Families bring food pot luck, and each class makes a food based on what they grew in the school garden. I’ve helped my girls’ classes make jam and thumbprint cookies and soup.
Our family is bringing this squash mac and cheese to the potluck. It’s one of my favorite fall foods. The squash adds fiber and a little sweetness. I’ve this from adapted from Elie Krieger’s recipe.
Squash Mac & Cheese
1 lb macaroni (I used a slightly smaller box)
1 quart cooked squash* (2 10-oz packages frozen)
2 cups milk
8 oz grated cheddar cheese (or other sharp cheeses)1/2 tsp. salt
1 tsp. powdered mustard
dash cayenne
1/4 cup plain bread crumbs
2 Tbsp grated Parmesan cheese
1 Tbsp olive oil
- Preheat the oven to 375 degrees F.
- Cook the macaroni and drain well. Pour into a buttered 9 x 13 baking dish.
- In the meantime, heat the squash and milk together until it starts bubbling. Stir frequently to prevent sticking. If your squash was not pureed previously, you may want to use an immersion blender at this point to smooth out the sauce.
- Stir in the salt, mustard, and cayenne.
- Add the cheddar cheese and stir until just melted in.
- Pour the cheese mixture over the macaroni, stirring to make sure the sauce spreads over all the noodles.
- Mix the bread crumbs, Parmesan, and olive oil together. Sprinkle over the macaroni.
- Bake for about 20–25 minutes.
Sometimes I add a meat like ham and/or other veggies like peas, broccoli, or kale to make it a more complete part of dinner.
* I cut my squash in half and place cut side down in a baking dish. I add about an inch of water and bake at 350 degrees F until the squash is soft. After it cools, remove seeds and scrape the squash flesh out of the skin. (You can simmer the seeds and skin to make a mild vegetable broth if you wish).
by Sara Barry | Aug 2, 2014 | cooking, kids in the kitchen, summer
 I grew up with wild blueberries in our yard and the woods behind it. For years, though I’ve picked large, cultivate berries at PYO places. I love those too, but the tiny, flavorful wild berries still had a place in my heart. Now they have a place in my freezer too, thanks to the Benson Place.
I went last year for the first time, turning off Route 2 into an upward maze of paved and dirt roads. As we were led to our picking spot, I thought, “It’s Blueberries for Sal.” The hilltop landscape covered with the low scrubby bushes certainly fit, but instead of tin pails we had wooden boxes, and instead of picking by hand, we used rakes to comb through the bushes and collect the berries.
This year, the bushes were heavily laden and we quickly picked two boxes (usually about 20 lbs each, but we were ambitious and piled on a few extra pounds). After picking, you bring your boxes of berries back to the sorting shed where the sorter gets out leaves, weeds, and other debris that got scooped up in your rake. The berries roll out on a conveyor belt so you can pick out any green berries, mushy berries, or stems.
My big box yielded 9 frozen quarts of berries, a batch each of raspberry-blueberry jam, blueberry jam (favorite of my dad and my big girl), and blueberry-maple sauce (for pancakes or ice cream). I’ve got quart containers set aside for more jamming, a blueberry pie, and just snacking.
This morning, I used three cups in a big batch of butterfly pancakes. Like wild blueberries, butterfly pancakes are linked to my childhood.. My mom used to make them for us. She used bacon for the antennae. I would have too, but I was out of bacon.
Butterfly Pancakes
pancake batter
blueberries
sausage
bacon or sliced fruit
- Start cooking your sausage or bacon (if using it).
- Mix up a batch of your favorite pancake batter. (I use the griddle cake recipe in the Fanny Farmer cookbook).
- Heat your griddle or skillet and skate some butter over it to grease. Pour or ladle pancake batter, keeping the pancake diameter about the size of a sausage (or a little smaller).
- When the batter is dimpled with holes, sprinkle berries across the pancake. Flip.
- Cook until the bottom is browned.
- To assemble, place a sausage in the middle of the plate. Put one pancake, blueberry side up, on either side of the sausage. Add bacon or sliced fruit for antennae.
What’s your favorite thing to do with blueberries?
by Sara Barry | Jul 29, 2014 | cooking, summer, use what you have
My weekend canning sessions were inspired by using what we had on hand. Cucumbers weren’t part  of the plan, nor were jalapenos, but we had lots so we canned them.
This ice cream was inspired by raspberries I picked last week. I froze three quarts of berries, but I kept some in the fridge to eat fresh. We did eat some, but the rest were sitting there getting mushy and juicy and begging to be used.
When I started making this ice cream, I remembered why I rarely make chocolate ice cream. You need to melt the chocolate and then let it cool completely before making the ice cream. It takes and extra half hour to an hour, but it’s worth it. Plan on starting about 4 hours before you want to eat ice cream (though if you eat it right out of the ice cream maker before it really “sets” it’s really good that way too). When it comes to bowl or spoon licking, I usually let me kids do a lot of the licking, but I made sure I got my fair share on this one.
Chocolate Raspberry Ice Cream
(makes about 5 cups)
½ cup 1% milk + ½ cup half and half (or 1 cup whole milk)
8 oz bittersweet chocolate, roughly chopped
½ cup sugar (scant)
2 cups heavy cream
½ cup mushy or mashed raspberries sprinkled lightly with sugar
- Pulse the chocolate and sugar in a food processor until chocolate is very small.
- Heat the milk and half and half in a small heavy bottomed sauce pan until it just starts to bubble at the edges.
- Remove from heat and add chocolate. Stir until chocolate melts and mixture is smooth. Pour into a 2-quart or larger mixing bowl. (An 8-cup liquid measure or a large batter bowl work well). Chill.
- Stir the heavy cream into the chocolate mixture. Pour into your ice cream maker, following instructions.
- About 5 minutes before the ice cream is done (about 25 minutes in my machine), add the raspberries. Let the machine run for 5 minutes more. Transfer the ice cream to a covered container and let set for about 2 hours.
Go make some ice cream—or at least eat some!
by Sara Barry | Jul 15, 2014 | cooking, kids in the kitchen
It’s sticky and damp. The kind of weather where poorly treated wooden furniture gets gummy and wet bathing suits never really dry and start to smell sour. It’s the kind of weather where papers get limp and chips in an open bag go soft almost immediately. In this general sogginess, there’s an appeal to crunch.
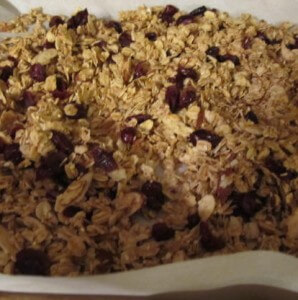
This morning, breakfast was simple and cool—and crunchy. I scooped up yogurt and the granola I made last night (with a little homemade apple sauce for the girls too).
I’ve been collecting granola recipes for a while. I stumbled across these from Katrina Kenison, Molly Wizenberg, and Deb Perelman at Smitten Kitchen (side note for years I read that as Smitten Kitten, which has the benefit of a rhyme but doesn’t make a whole lot of sense for a food blog). I ended up adapting this adaptation of Alana Chernila’s granola from The Homemade Pantry.
The recipe I consulted said it would make 16 cups, which seemed like a lot if I didn’t love it (or if I was the only one who liked it), so I halved it. I ended up with two quart jars and most of a pint jar filled (after I stood over the pan and consumed what felt like half a pan).

Sara’s #1 Granola
5 cups rolled oats
1 cup sliced raw almonds
1/4 cup wheat germ
2 Tbsp flax seeds
2 Tbsp sesame seeds
¼ cup raw millet
1 ½ tsp ground cinnamon
½ tsp sea salt
½ cup coconut oil (or a little less)
¾ cup maple syrup
¾ tsp vanilla extract
¼ tsp almond extract
½ cup unsweetened coconut
½ (or more) dried cranberries
- Preheat the oven to 250 degrees F.
- Combine the dry ingredients (oats, almonds, wheat germ, flax seeds, sesame seeds, millet, cinnamon, and salt) in a large bowl. (Don’t add the coconut and dried cranberries yet).
- Whisk together all the wet ingredients (oil, maple syrup, vanilla and almond extracts).
- Pour the wet ingredients over the dry ingredients and mix with your hands until everything is coated.
- Spread this mixture on two cookie sheets with sides (lining with parchment paper is optional—I did this time).
- Put the cookie sheets in the preheated oven and cook for about 90 minutes. Rotate the
 pans every 30 minutes to keep them cooking evenly. (You don’t need to stir the granola, just rotate the pans.) With about 15 minutes left, sprinkle the coconut over both pans.
- Remove from oven when granola is browned. Mix in the dried cranberries while granola is still warm (Add any dried fruit after you take the granola out of the oven so they don’t overcook and harden). Let cool completely before storing in airtight containers.
Notes
- I might try baking this a little longer next time for a little more golden brown color. I started late, so bed won out over browning. I’ll also try spreading the granola a little thinner in more pans.
- Don’t skimp on the salt.
- Granola offers lots of flexibility. I used flax seed, millet, and wheat germ because I happened to have them in the house. I could have used sunflower or pumpkin seeds. I think I like the millet, though. I used maple syrup as a sweetener because I have a lot of it, though I could have used a mix of maple and honey. For dried fruit I only had dried cranberries and raisins in the house, and I’m not a huge fan of raisins.
- Based on another recipe I read, I added the coconut late to keep it from overbrowning, though I haven’t experimented enough to know if that’s necessary.
- I made this at night after the kids were in bed, but I realized they’d probably enjoy helping next time. There’s plenty of non-exact measuring and lots of mixing—and helping make it might convince the little one who didn’t like it to give it another try. Mixing in chocolate chips would probably do the trick too.


