by Sara Barry | Jul 28, 2014 | canning, kids in the kitchen, summer, use what you have
I had an eight-hour canning extravaganza on Saturday, which felt utterly productive.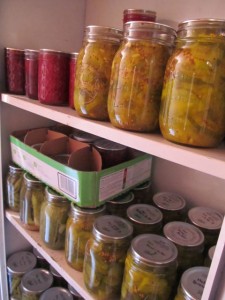
I knew I was in for dilly beans and raspberry jam and raspberry chocolate liqueur sauce, but when I showed up at my friend Kath’s house she had a colander full of cucumbers too. Always game, I asked, “Dill or bread & butter?”
Since the dill pickles we like need to sit for at least 12 hours (and I wasn’t planning on staying quite that long), we decided on bread & butter. But there were all those jalapenos. Our first batch of spicy bread & butter pickles was born.
When making these pickles, the cucumber, onion, and peppers sit in a salt brine for two hours before you cook and can them, so we started the process and then went to pick raspberries. We came in got our jars heating, had lunch, and got canning.
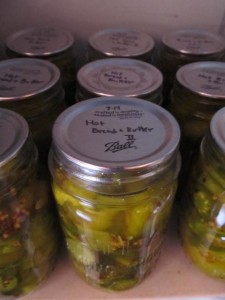
We had a not quite full small jar to wrap up our batch of pickles, so after it cooled a bit, we stuck it in the fridge. We usually end our canning days with ice cream, but instead we ended with pickles. They were cold and sweet and spicy all at once. We ate the whole jar standing up and agreed this was a keeper. I liked them so much, I made another batch on Sunday by myself.
In eight hours, we squeezed in
- a batch of hot bread and butter pickles
- a double batch of dilly beans
- a double batch of raspberry jam
- a double batch of raspberry chocolate liqueur sauce (so good on ice cream)*
- a single batch of raspberry-mint-lavender jam (my big girl kept suggesting raspberry mint, so we tried it).
Hot Bread & Butter Pickles
(adapted from The Ball Complete Book of Home Preserving)
10 cups cucumbers sliced into rounds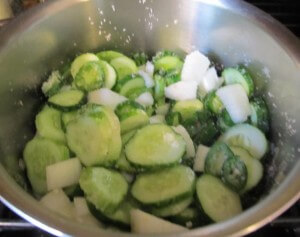
2 cups onion sliced (I prefer thick slices)
2 cups sliced jalapenos (we kept the seeds in)
½ cup pickling salt or Kosher salt
3 cups white vinegar
1 tsp turmeric
1 tsp celery seeds
2 Tbsp mustard seeds (we use mix of yellow and brown)
2 tsp pickling spice
- Mix the pickles, onions, and peppers with salt and cover with cold water. Let sit for 2 hours.
- Prepare 6 pint jars for canning: wash jars and bands in hot soapy water, rinse, and put into a filled canning pot. This recipe should make 5 pints, but I’ve learned to always put an extra jar the same size or smaller in the canner, just in case. Put the flat lids in a heat-proof bowl. Get your canning station set up: layout a towel on the table or counter. Get your ladle, funnel, tongs, slotted spoon, and a wet paper towel or clean rag ready.
- Go pick raspberries, have lunch, read to your kids, or whatever you like until the two hours is up.
- Start heating the canning pot.
- Mix the vinegar and spices together in a large pot. Bring to a boil. While that’s heating, dump the vegetables into a colander and rinse under cold running water.
- As soon as the vinegar mixture begins to boil, add the vegetables. Again bring just to a boil. Turn off the heat.
- Remove jars from the canning pot. Ladle water from the canning pot over the flat lids.
- Spoon the veggies into the hot jars, packing fairly tightly. Ladle the vinegar brine into the jars, leaving ½ inch headspace.
 Wipe the rims of the jars clean. Place a lid on each jar and screw on the band.
- Put the filled jars back in the canning pot. Cover and bring the water to a boil. Once it reaches a boil process for 10 minutes (adjust for altitude if necessary).
- Then turn off the heat and removed the cover. Let jars sit for 5 minutes. Remove onto a clean towel. Wait for the delightful ping of the jars sealing. If one doesn’t seal, stick it in the fridge to enjoy now.
* If raspberry chocolate liqueur sauce sounds good, look for Sundae in a Jar in The Ball Complete Book of Home Preserving. We replace the strawberries with raspberries.
by Sara Barry | Jul 21, 2014 | kids in the kitchen, parenting, summer, what's for dinner
“I’m bored.”
My five-year-old is usually pretty good at entertaining herself, but today, as happens more and more in the afternoon, she started pouting, “I’m bored.” I threw out ideas, all of which led her to wail and writhe on the floor, saying, “I don’t know what to do. I’m bored.”
I bit back a sarcastic comment about all her toys. I didn’t order to clean the play room. I abandoned temporarily my own plan to get back out in the garden. “We’re going to do a project,” I told her.
“What’s the project?” she asked as I laid out a handful of colored pens and a stack of old business cards on the porch table.
“We’re going to write down our ideas of things to do when we are bored.” I half expected her to start pouting again, but she jumped right in, “If you’re bored, you can . . . ”
- Do art
- Ride your bike

- Play with your dog
- Play with your dolls
- Watch birds in the sky
- Set up the box fort
- Weed the garden
- Pick food from the garden
- Play a board game or card game
- Look at books
- Do a word search or maze
- Dust
- Swing on the swing
- Blow bubbles
- Wash the outside toys
- Play with chalk
- Hula hoop
- Give wagon rides
- Go on a scavenger hunt
- Make a fairy house
- Catch bugs
- Play with Play Doh
- Look for stuff for fairy houses
When she tired of listing ideas, she seized upon the last one we came up with—look for stuff for fairy houses—grabbed a basket, and went collecting. I weeded the garden and occasionally handed her things to add to her pile. I’m not sure how well our boredom busters will work when the next round of “I’m bored” starts, but making our set of idea cards broke the cycle today.
Inspired perhaps by her fairy house search, she asked to have fairy soup for supper. She described it me, made it, and ate it. I don’t know why it’s called fairy soup, but here it is.
K’s Fairy Soup
Seasoned black beans
“messy” cheese (shredded Mexican blend)
salsa
tortilla chips
- Spoon black beans into a bowl. Take only as much as you will eat.
- Add two child’s handsfuls of shredded cheese. Heat to warm the beans and melt the cheese.
- Stir in a spoonful of salsa.
- Crumble a few chips over the mixture, again taking only what you know you will eat.
- Serve with additional chips for dipping.

How do you deal with
“I’m bored?”
by Sara Barry | Jul 1, 2014 | baking, summer
I took my girls strawberry picking this morning and came home with seven quarts. I was hoping for a bit more, but it was hot and sticky and the berries not overwhelmingly plentiful. I made jam on Saturday—a double batch of straight up strawberry and a double of strawberry rhubarb—so even though I was intrigued by the idea of a strawberry basil jam, I crossed jam off my list today. I love making jam, but I admit I wasn’t too upset to avoid a steamy kitchen.
 Here’s what I did instead:
- Froze them whole. I like to have bags of berries in the freezer to chop into oatmeal or smoothies throughout the year. We ran out of strawberries from last season about a week ago, so it was time to stock up.
- Made ice cream. I thought about strawberry shortcake for dessert, but did I mention it was hot today? I didn’t want to turn on the oven, so I thought cold instead. I found some chocolate cake in the freezer and served the still soft ice cream over it.
- Made popsicles. As I was hulling the strawberries to freeze, I pulled the ones with mushy spots or the ones my three-year-old picked that were half ripe, half yellow. I put the good bits in a bowl and blended them up with a little limeade. Four popsicles are now solidifying in my freezer.
- Froze margarita cubes. I figured this one out last year. Throw your smooshed berries in a blender and pour into ice cube trays. Then use the strawberry ice cubes in margaritas (or toss them in lemonade to make a “fancy” drink for the kids). I used the leftover popsicle mix this year.
- Baked a pie. I know. I said I didn’t want to turn on the oven. Even at 10, when a coolish breeze was occasionally slipping into the kitchen, I didn’t want to turn it on, but my husband’s a pie guy with a birthday coming up. I went with the classic strawberry rhubarb (recipe below).
- Ate them. Sometimes I get so busy doing things with the stuff I pick, I forget to just savor it. The kids grabbed them off the counter for a snack as they ran through the kitchen. I kept tasting as I was cutting them, and I put a scant quart aside for breakfast.
What are you doing with strawberries this year?
Strawberry Rhubarb Pie
2 1/2 cups sliced strawberries
2 1/2 cups sliced rhubarb
3/4 cup sugar
1 egg
2 Tbsp. water
handful of cornflakes
pie crust (top and bottom for a 9-inch pan)
- Preheat the oven to 425 degrees F.
- Put the bottom crust in a 9-inch pan. Crush the cornflakes and sprinkle over the crust.
- Combine the strawberries and rhubarb in a medium bowl.
- In a small bowl, mix the sugar, egg, and water together. Pour over the strawberry-rhubarb mix and stir to combine.
- Pour the filling into the crust in the pie pan.
- Cover with the top crust, crimp the edges, and cut a few slits in the crust.
- Bake for 10 minutes. Then reduce heat to 350 degrees and bake for about 40 minutes more. The crust should start turning golden and the filling should bubble lightly.
by Sara Barry | Jun 23, 2014 | summer, what's for dinner
I was late to the game when it came to  both garlic scapes and grilled pizza, but last summer I finally figured out both, and they make the perfect pairing for an early summer dinner.
I’ve been waiting for garlic scapes—the curly tops of garlic that get cut off in late spring/early summer—to appear, and recently CISA told me it was time. I don’t grow garlic (yet). Somehow in the bustle of fall, I never manage to plant garlic . I’m determined to change that this year but for now, I have no scapes of my own. I pick them up at a farmer’s market or the local co-op.
Garlic scape pesto is bright green with a bright garlic taste. It’s easy to make and stores well. Both the color and the flavor will mellow a little if it’s cooked as it is on pizza.
Garlic Scape Pesto
- 1/2 lb. garlic scapes
- 1/3 c. lemon juice (from about one medium lemon), or more to taste
- 3/4 cup olive oil
- ½ cup grated Parmesan cheese
- 3/4 cup grated Pecorino romano cheese
- Roughly chop the garlic scapes and put them in the bowl of your food processor. Add the oil and lemon juice.
- Run the processor until you have a fairly smooth puree. It will be rougher than a traditional pesto, but you don’t want huge chunks in it.
- Add the cheese and pulse briefly or stir in by hand.
- Taste. Add more cheese or lemon juice if needed. If the pesto is too thick add a bit more olive oil.
Garlic scape pesto is great on crackers, toasted bread, pasta—and grilled pizza.
Like I said, it took me a while to figure out grilled pizza. How do you get the pizza onto the grill? Won’t the dough just fall through the grate of the grill? I finally read about it, realized it wasn’t that hard, and got mildly obsessed with it last year.
Grilled Pizza
- Start with your favorite dough. Roll or stretch it into an individual pizza size (too big and it gets hard to handle). Do not roll the edge—the dough should be flat from side to side. Sprinkle a pizza peel or the bottom of a cookie sheet with corn meal and place the dough on it.
- Prep all your toppings and have them grill side.
- Heat the grill and brush with olive oil. Slide the dough onto the hot grill and close the cover. DO not walk away. Grill for about 2 minutes. Seriously—it’s quick.
- Use tongs or a spatula to remove the crust from the grill and place it cooked side up on your cookie sheet. Cover the grill again to keep it hot.
- Spread sauce or better yet, garlic scape pesto, (go lightly so the pizza isn’t soggy) on the crust. Add cheese and t
 oppings (again go lightly, especially with wetter ingredients).
- Slide the topped pizza back onto the grill and close the cover again. Lower the heat and cook for another 2–3 minutes and dinner is ready. Enjoy!
I used garlic scape pesto, basil Italian sausage from our local market, and roasted tomatoes for my pizza. The girls had sauce, mozzarella, sausage, and pepperoni. We had salad on the side, because the garden is really cranking out greens and the radishes are begging to be picked.
Welcome, summer!
